Category Archives: Canning Recipes

Canning Pork Loin

When the local grocery store had pork loin on sale for $1.88 per pound, I snatched up four huge loins.  I used this as an opportunity to stock pile some pork in my basement grocery store.

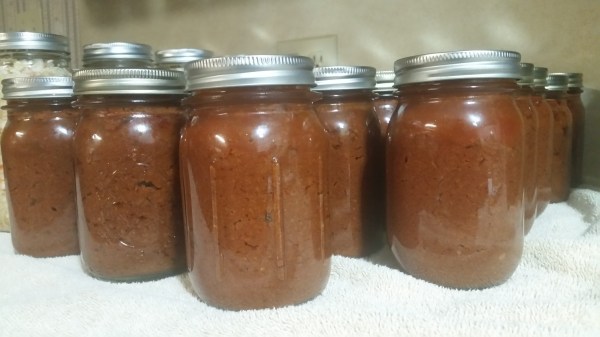
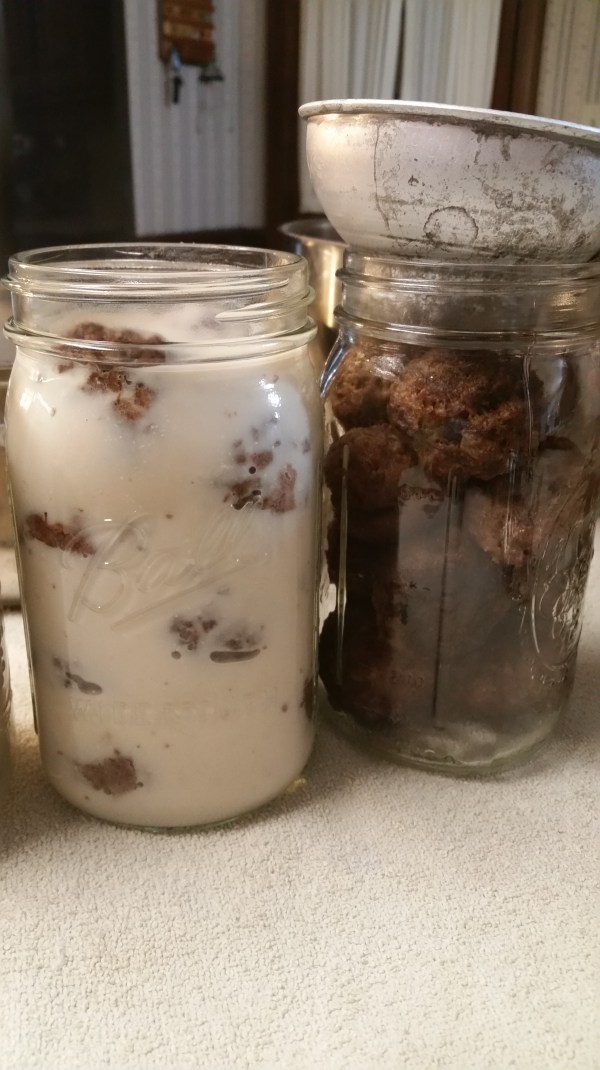
Canning pork loin can be done one of two ways.  My sister uses the “Cold Pack Method” and I use the “Parboil Method”.  They both work, they both produce a nice product.  The biggest difference between the two is the Parboil Method takes a little longer to boil the meat before you pack it into the jars.  To me it’s worth the extra 10-15 minutes to keep the proteins in the meat and not stuck to the inside of the jars.  Canning meat can leave a messy jar clean up later down the road, but parboiling helps with that a little bit.  I still prefer to use wide mouth jars just for easier clean up.

The jar on the left was Parboiled, the one on the right Cold Packed. See the difference in the jars??

20170623_070535

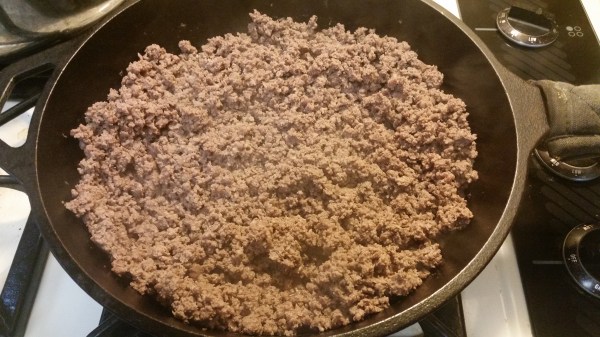
Trim as much fat as possible off of the meat and cut up the pork into chunks.

20170622_202320

Put the pork in a large stock pot with boiling water and parboil it until the scum floats to the top.  Skim the scum off.

20170622_204301

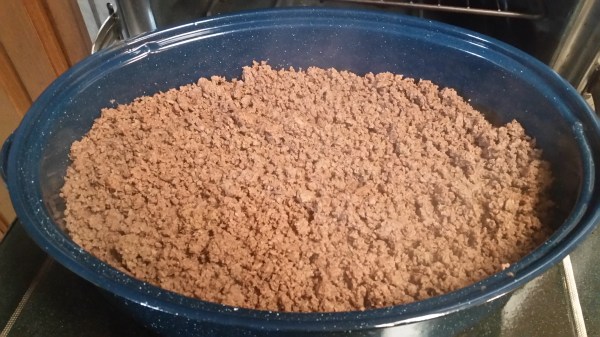
Once boiling, boil for 10 minutes.  Ladle the hot meat into hot, sterile jars using a slotted spoon.  Approximately, 1 pound will fit in a pint jar, 2 pounds per quart, so can it according to your family size.  I have growing boys, so we use a lot of quarts.  Add 1 teaspoon of canning salt to each quart jar. Pour hot stock from parboiling or boiling water over the meat leaving 1 inch of head space.


Remove all the air bubbles using a plastic knife to keep from damaging the jars.

Pressure can pints 75 minutes and quarts 90 minutes on 10 lbs of pressure.  (Adjust the pounds of pressure to your elevation.)

20170623_070430

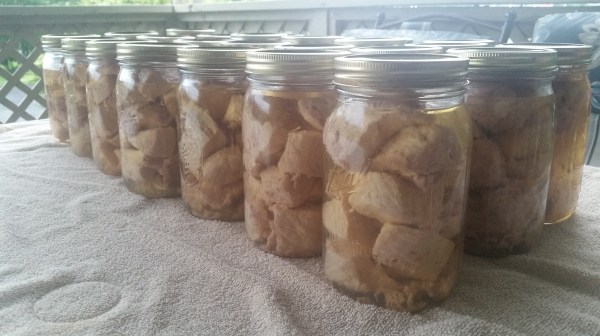
Now it’s time to enjoy!  Pork tenderloin for dinner anyone?  How about carnitas….or better yet – pulled pork barbecue!  The options are endless…..

Watermelon Rind Pickles

My grandmother used to make these and I’ve hunted and hunted for a recipe to come close to what she made.  I found several similar recipes on Pinterest and in the Ball canning book.  We will give it a try and doctor as needed the next go around.  This is a 2 day process and a lot of work for a little yield; but the smell of it cooking….wow!

The rinds will need to be cut and let soak over night with the salt and water the day before you process them.  The thicker the rinds, the better.

  • 4 qts of 1 inch cubed watermelon rinds, mostly green, some pink
  • 1 cup Canning Salt
  • 2 gallons of water, divided
  • 3 sticks of cinnamon
  • 1 tablespoon of whole cloves
  • 1 tablespoon of whole allspice
  • 1/4 teaspoon of mustard seed
  • 7 cups of sugar
  • 1 thinly sliced medium lemon
  • 2 cups vinegar

Cover watermelon rinds with salt and 1 gallon of water, stirring to dissolve the salt and let soak 12 hrs or over night.   Drain; rinse.

Cover rind with 1 gallon of water in a large stockpot.  Cook until tender.   Drain; set aside. Tie spices in a spice bag.  When you can’t find a spice bag – make your own – coffee filters and a string work nicely.

Combine spice bag, sugar, lemon slices and vinegar in a large pot, bring to a boil.  Reduce heat and simmer 10 minutes.

20170612_113707

Combine sugar syrup mixture and rind, simmer until rind is transparent.  Don’t over cook, you’ll end up with a lot of liquid and a little bit of rinds, more of a preserve consistency than pickles.  Remove spice bag.  Pack hot rinds and liquid into hot jars leaving 1/2 in head space.  Remove air bubbles.  Adjust 2 piece ring and lid.  Water bath for 10 minutes.

20170612_133103

The watermelons that I used yielded 6 quarts of watermelon rinds so I adjusted my recipe to accommodate and it yielded 7 pints.  .

Canning Hotdog Chili

It never fails, this is one of those things that I never have on hand when I need it.  Not to mention, I’m always a little leery of what’s in processed store bought chili so I thought we’d try our hand at canning our own.  Needless to say, my boys loved it and wanted to help jar this up – so they could scrap the pot!  This is great on a hotdog, by itself or you can add some beans and have chili beans!

20170612_125023

Here’s the ingredients per 1 pound of ground beef.

  • 1 lb of ground beef
  • 3 1/2 cups of water
  • 2 – 10 oz cans of tomato paste
  • 1 lg onion finely chopped
  • 2 T chili powder
  • 1/2 teaspoon of cumin
  • 1 teaspoon of brown sugar
  • 1 teaspoon of garlic salt
  • 1 teaspoon of salt
  • 1 teaspoon of pepper

Do not brown the meat, if you do you’ll end up with clumpy, thick chili.  The trick to the smooth chili texture is to mix the thawed burger with hot water until it’s broken down and fine. We sauteed the onions, added the spices to the onions and then added that to the meat and water.

20170612_125259

Mix well and then add the tomato paste, 1 can at a time, mixing well after each can.

20170612_130005

Simmer 4-6 hours, stirring frequently or you can cook it on low over night.  After it’s cooked thoroughly, you may sample and adjust the spices as needed.

20170612_133221

This roaster held 5 times this recipe and yielded 23 pints and LOTS of sampling.  So if you do 1 pound it will fit in a large crockpot and you’ll average 5 pints.  Scoop the chili sauce into hot, sterile jars, wipe the rims very well and remove air bubbles.  Adjust the 2 piece lid/ring and tighten.  Pressure can at 10 pounds of pressure for 75 minutes for pints and 90 minutes for quarts.  Processing will thicken the chili, so once opened add water if desired.

20170612_213243


Canning Cole Slaw

I know, “canning” and “cole slaw” don’t go together.  But anything that saves me time and money in the long run is worth a shot!  One thing about it – I’m not afraid to experiment when it comes to canning, especially if I have most of the ingredients on hand or it’s cheap to make.  It never fails my boys will grab a pack of hotdogs and out the door we go to the cabin.  I wanted to add something to our shelf stable pantry at the cabin for those occasions; that’s what sparked the interest in canning cole slaw and hot dog chili.  You’ll read about the chili in another post.  This recipe is simple.  Chop, shred, boil, mix and jar up, pretty much it’s that easy.

What’s pictured below yielded 5 quarts.

20170612_151214

  • 2 heads of Cabbage, shredded
  • 2 Red Peppers, diced
  • 2 large Carrots, shredded (if desired)
  • 2 medium Onions, diced
  • 2 teaspoons Salt

Mix the onions, peppers and cabbage together, cover with the salt and let sit for at least 1 hour.

20170612_172645-1

Mix the syrup, heat until the sugar is dissolved and set it aside.

  • 4 cups of Sugar
  • 2 teaspoons Mustard Seed
  • 2 teaspoons Celery Seed
  • 2 cups of Vinegar
  • 1/2 cup of Water

20170612_151500-1

Once the syrup is dissolved, drain the cabbage mixture, rinse if desired and mix the syrup and cabbage together.  Put the mixture in hot, sterile jars, wipe the rims with a sterile cloth, tighten the 2 piece ring/lid.

Water bath for 10 minutes.

20170612_194251-1

You can eat this straight from the jar and serve as a bbq vinegar based slaw.  Prefer a mayonnaise based slaw – no problem – drain (rinse if you prefer) and add mayonnaise! Enjoy!

Canning Ground Beef or Venison

When I say I’m canning ground meat, people look at me like I’m crazy….why would I want to can it when it’s “just fine” in the freezer.

Here’s a couple of my reasons:

  1. To free up freezer space
  2. To increase the longevity of the meat. Canned meat lasts years longer than frozen meat
  3. A little work done up front saves a lot of time in the long run
  4. To prevent my meat from ruining in the event of a power outage

Keep in mind, 2 lbs per quart jar, 1 lb per pint.  When I can mine, I like to do at least a canner full, 6 or 7 quarts.  As I’m browning meat, I get a roasting pan ready and store the meat in the oven on warm until it’s all browned.

20170605_160703


20170605_164000

When canning dry meat, I make sure all the jars are boiled thoroughly.

20170605_162953

Fill the jars leaving 1 inch head space.  The meat will draw up during processing.  We are canning this dry, so no liquid will be added.

20170605_184549

Pressure can for 90 mins on 10 lbs of pressure.

20170605_215246-1

Now you’ve just saved yourself a lot of time in thawing and cooking ground meat for tacos, spaghetti, ground steak (it’s a Surry County thing) along with many more possibilities.

Strawberry Rhubarb Jam

Some of my fondest memories of Grandma’s kitchen involve a strawberry, rhubarb combination.  She used to make some of the best cobblers!  She never measured anything and I’d get tickled when she cooked with rhubarb.  She would add what she thought was enough sugar, then she’d add a little more just for good measure!  I had to figure out a way to get that combination of tart sweetness into something that I could eat in much smaller portions. There’s something about combining the sweet strawberries with the tart rhubarb that makes a blissful combination and leaves you wanting more.   When I tasted this jam, I could close my eyes and envision standing back in Grandma’s kitchen.
Rhubarb can be hard to find in my area until late May.  Sometimes, you can find it at the Farmer’s Market or the grocery store.   I got super excited when I found some at Food Lion last week!  I never remember year from year what I pay or how many cups a pound will yield.  This year rhubarb costs averages $2.50-$3.00 a pound and it yielded approximately 4 cups.
  • 8 cups rhubarb, cut into small 1/2 inch, or smaller, pieces
  • 6 cups strawberries, mashed
  • 6 cups sugar, cut in half
  • 1 pad of butter
Wash strawberries and rhubarb very good.  Cut rhubarb stalks into small pieces.
Cover the rhubarb with 3 cups of sugar, set aside and and let it set 1 to 2 hours.
Cap and mash the strawberries and mix with remaining 3 cups of sugar and set aside combine or 1 to 2 hours.
20170529_194310
Combine the strawberries with the rhubarb in a pot on the stove and cook on low until all the sugar is dissolved, then boil rapidly, stirring frequently to prevent sticking.
20170529_204032
When it begins to foam, add a little bit of butter and watch how quickly the foam disappears!  Skim off any foam that doesn’t disappear.
Continue to cook until thick, continually skimming the foam off of the top.  The whole cooking process will take about 45 minutes from start to “thick”.
20170529_211242-1
After 25 to 30 minutes into the cooking process, get your canning supplies ready.  Start a water bath canner about half way full of water and a pot of water for your lids.  Turn the oven on 200 degrees and  put your sterile jars in the oven to get them hot.  Once the jam is ready, pour it into sterilized jars leaving 1/4 inch headspace.  Wipe rims, place lids, tighten rings and place in hot water bath.  Process for 15 minutes and let sit for an extra 5 minutes before taking out of the canner.
This recipe yielded 11 of the 4 oz jelly jars.

Canning Swedish Meatballs

I’m all about canning things to make meal prepping quick and easy.   Oftentimes, we have last minute guests for dinner and I need to be able to throw something together quickly.   Unexpected guests used to throw me into a tail spin hunting for something to cook; not anymore, now I simply go into the basement and grab a jar.

Thanks to my husband who loves change we’re adding Swedish meatballs to that menu…

For 7 quart jars, here’s the ingredients you will need.

  • Ground Beef or Venison – 5 lbs
  • Garlic cloves (to taste) we like Garlic so we minced 4 cloves
  • Onion – 2 medium, diced and caramelized
  • Italian Bread Crumbs – 2 cups
  • Cream of Mushroom Soup – 6 of the small cans mixed with water. We prefer to use water instead of milk when canning it.

Some recipes call for plain bread crumbs and lots of Italian spices, to us it made more sense to use the Italian bread crumbs and add additional spices if you’d like.  Keep in mind, when you’re canning with spices, they do tend to get stronger in flavor over time.

Cook the onions until they’re caramelized.

20170526_183328

Mix the ground meat, garlic, onions, bread crumbs and any spices by hand. Roll out golf ball size meat balls. Precook the meatballs for 30-45 mins on 350 degrees, until they’re done.

Once all of the meatballs are cooked. Place the sterile jars in the oven to get them hot.  Start the canner with water and start the pot of boiling water for the lids.

Mix the cream of mushroom soup up per the directions.  I like to keep a few extra cans of soup on hand just in case you run out of soup.  If needed, it takes just a minute to get more going to add to extra jars.

20170526_205612

Pack the jars full of meatballs and pour the hot soup over the meatballs.  Leave 1 inch of head space.

20170526_210107

Wipe the rims with a sterile cloth, place the lids/rings and hand tighten.   Pressure can for 90 minutes on 10 pounds of pressure. *NOTE, based on your elevation,  your pounds of pressure may be different.  Adjust accordingly.

Enjoy!

Strawberry Pie Filling

This comes in so handy when you need a quick dessert for a get together or last minute guests.  Open a jar of Strawberry Pie Filling, pour it into a pie crust, bake and you’ve got Strawberry Pie in no time!
This recipe, as listed below, yields 4 quarts.  As always, I canned big.  I more than doubled the recipe and it yielded 10 qts.
 20170522_201145
Ingredients for 4 qts:
  • 16 cups (4 lbs.) strawberries, sliced
  • 3 1/2 cups white sugar
  • 1 1/4 cup Clear Jel, can be purchased from most local Amish Stores.
  • 4 cups water
  • 4 1/2 Tablespoons lemon juice
Slice strawberries and set aside.  I got really lucky this time!  I had a friend to call me and ask if I could use some strawberries.  She’d worked herself sick of strawberries that week!  She had some that she was ready to throw out; not because they were bad, but because she was sick of strawberries!   The berries were already capped and ready to go!  I felt like I had won the lottery!  Thank you my dear friend!!!
Preheat the oven to 200 degrees to get the jars hot, start a water bath canner with water and start a pot of boiling water for your lids.  Once you get started, this is going to go quick.
In a large pot, combine sugar, Clear Jel, water, and lemon juice. Bring to a boil over medium heat, stirring constantly.   This stuff will stick and scorch in a second with no notice, so stir, stir, stir!
20170522_202655
Within 5-7 minutes it will begin thickening, gel, and begin looking like this:
20170522_203334
Stir or fold in the strawberries once the mixture is thickened. This stuff will thicken even more the cooler it gets.  (Yes, I really did put all 40 cups of strawberries in the pot!)
20170522_203856
Spoon the hot mixture into sterile mason jars leaving 1 & 1/2 inch headspace.  This headspace is important!  If you don’t leave the full 1 & 1/2 inch headspace it will bubble out and make a mess while in the water bath canner.  I even had one to blow the lid!  Thank goodness, I had my canner lid on, or else that would have been one big mess!
20170522_212615
Water bath 30 minutes.  As the jars sit, don’t be surprised if pie filling run out from under the lid and down the side of a few jars, they will still seal.  I had a few do this.  The only thing I can figure is those needed 2 inches of head space! I left them be, let them do their thing and washed the jars the next morning as I removed the rings.

Canning French Onion Soup

Bye Bye Lipton’s Onion Soup mix, I think I will use French Onion Soup for my roast base from now on….besides who really knows what’s in those dehydrated dust packets?!

I love any kind of soup and this one works somewhat as a multi-purpose soup in my household.  One that I can eat straight out of the jar or one that I can use as a base for cooking.  I hate using one of those “onion soup” packets that has no telling what in it.

This took just a few minutes to throw together and it yielded 10 pints.  Before I started slicing the onions, I placed my sterile jars in the oven on 200 degrees to get them to the desired heat before canning.

20170226_133734-1

  • 2 Tablespoons of butter
  • 7 or 8 medium onions, sliced
  • 3 garlic cloves, minced

Peel and slice the onions.  I cooked mine in a cast iron pan with a little bit of butter, cook them until the onions are tender then mix in the minced garlic.  In a large saucepan, I mixed together the following soup base:

  • 12 cups of beef broth (that I made from Better than Bouillon Beef Paste)
  • 2 tablespoons of A1 Steak Sauce
  • 2 teaspoons of canning salt

20170226_140929

Spoon the onions evenly into the 10 hot sterile pint jars.

20170226_141646-1

Then fill the jars with the hot broth mixture leaving 1 inch head space.

20170226_142322-1

Wipe the rims with a sterile cloth.  Place a hot lid and ring on each jar and tighten.  Pressure can on 10 lbs of pressure; pints 60 minutes and quart for 75 minutes.

Enjoy!

Canned Baked Beans

I love knowing what I’m eating and what I’m feeding my boys.  When I started through the cabinet to see what I still had left in processed cans, it was clear that I needed to learn Bush’s secret….so here’s what we came up with for baked beans.

20170218_214939

I have doubled the recipe below, used some pints, some quarts and ended up with 7 quarts and 5 pints of baked beans.
  • 2 lbs of dried Navy Beans
  • 2 medium onions, chopped
  • Country Ham Trimmings (OR 1/2 Teaspoon of salt per pint)
  • 2 – 15 oz cans of tomato sauce
  • 1/4 cup brown sugar
  • 3/4 teaspoon prepared mustard
  • 2 tablespoons molasses (can use honey or corn syrup, any type of liquid sweetner)
  • 3 cups water

In a large stock pot mix together the tomato sauce, brown sugar, mustard, molasses and water to create a hot tomato sauce mixture.  Bring to a boil and stir often, until all the ingredients are dissolved.

In each hot, sterilized pint jar add 1/2 cup dry beans, 2-3 Tablespoons of onion and 1 piece of ham trimmings.  **I don’t soak my beans overnight like some folks, I do rinse them right before I put them in the jars.

20170221_204459

Add 1 cup of hot tomato sauce mixture that you just brought to a boil to each jar of beans.  Fill the balance of the jars with boiling water, leaving one inch headspace.  This is important as the beans will swell in processing.

20170221_205323

Wipe each jar rim with a damp sterile cloth, place hot lids and rings and tighten to fingertip tightness.  Pressure can pints for 75 minutes at 10 lbs of pressure, quarts 90 minutes.

After processing, allow the canner to cool and depressurize naturally before removing the jars.  Once removed I place my jars on a towel, cover and listen for the victory PING!


20170221_233735-1

One step closer to ZERO processed foods…..