Category Archives: Canning Recipes

Canning Squash

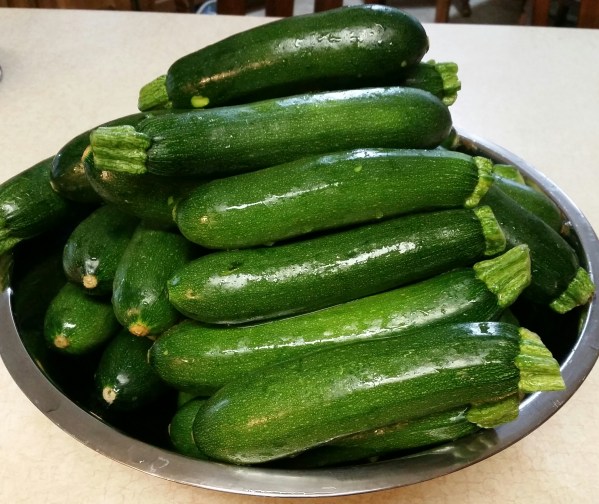
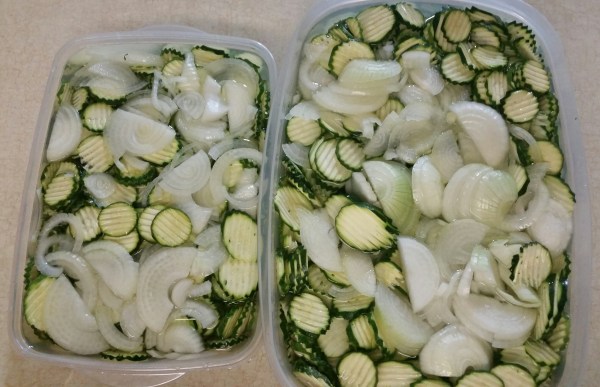
If you like stewed squash, squash casserole or squash and onions, this is a canning recipe you don’t want to miss.  Some will say that they don’t recommend canning squash, but I will share with you what my family has done for generations and it works.  This squash is great in casseroles, by itself stewed and even stewed with onions.  When we can, we can big, there’s 25 lb of squash in each side of the sink.

20160706_185448

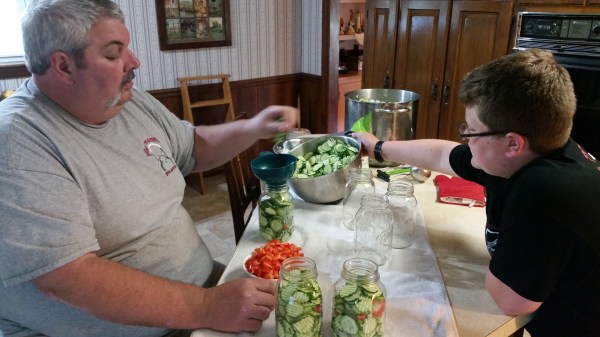
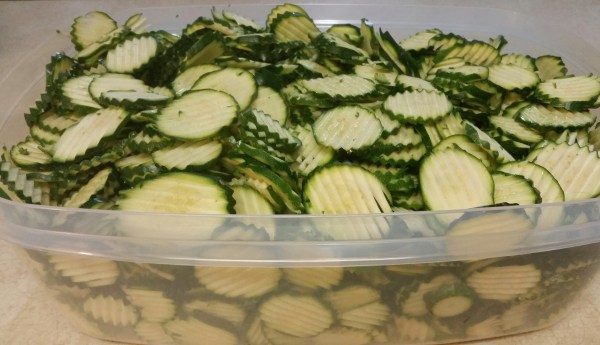
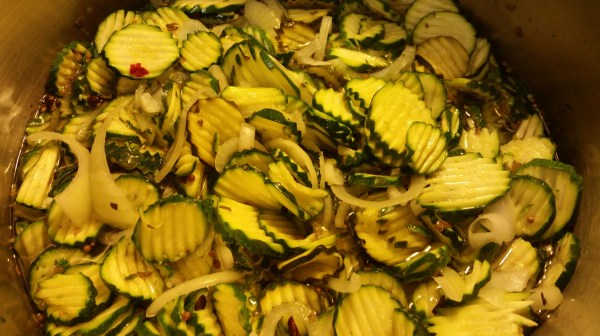
Slice squash into thin slices.

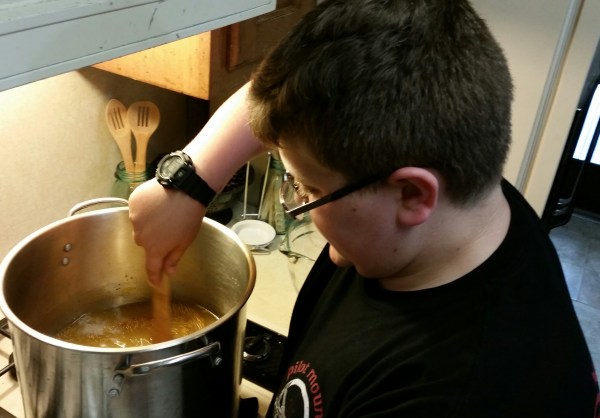
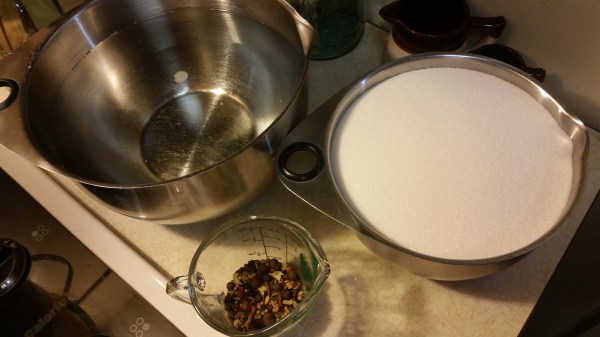
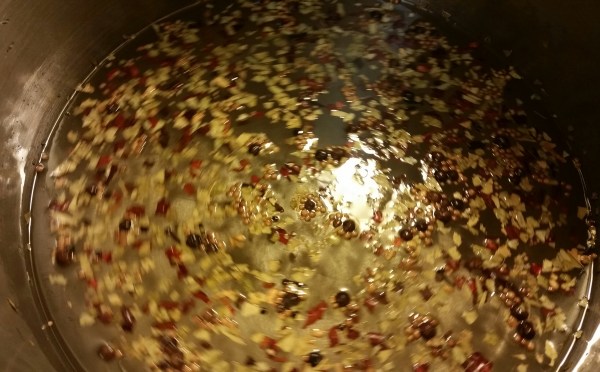
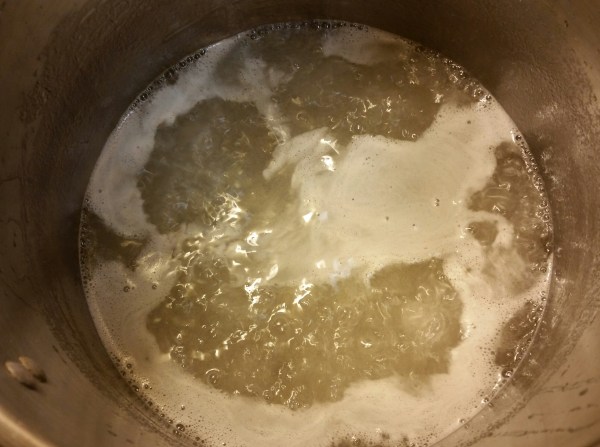
Preheat the oven to 200° and heat the jars.  Begin a pot of boiling water to add to the jars.  Start a pressure canner with 2 quarts of water.  Start the water for your lids.  Once the lid water boils, drop the lids in and turn that water off. 

20160706_201931-1

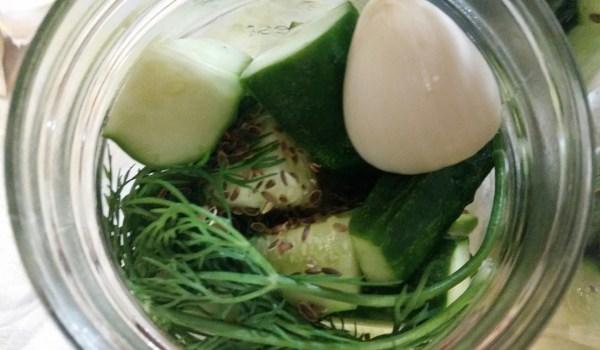
Pack squash into hot jars.  Add 1 teaspoon of canning salt per jar.

20160706_203116-1


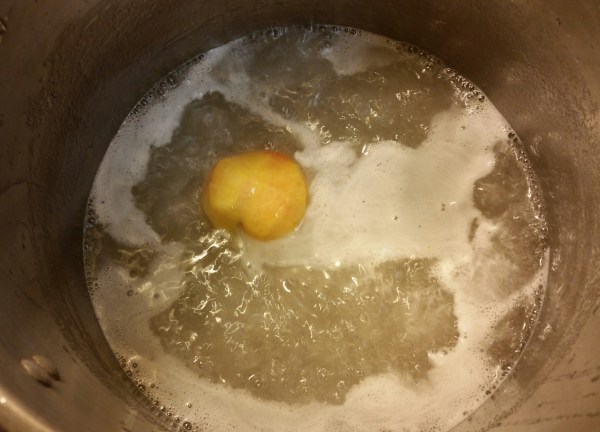
Fill each jar with boiling water and leave 1 inch of head space.  Remove the air bubbles from the jars.  You can carefully tap the jars on the counter and bubbles will rise to the top or you can insert a knife down the side.  Wipe each rim with a sterile cloth, place hot lids, seal with rings.  Don’t over tighten.

20160706_204112

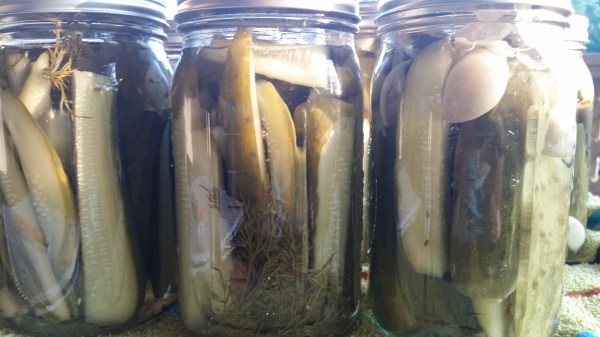
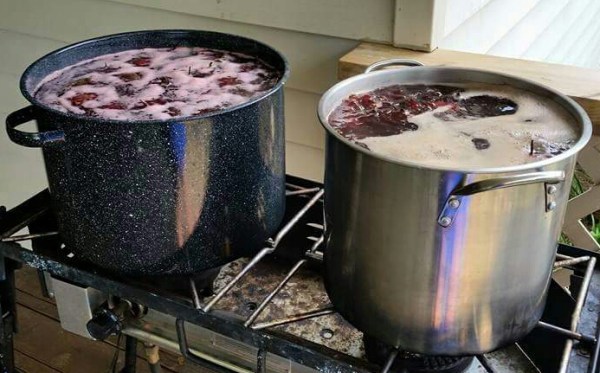
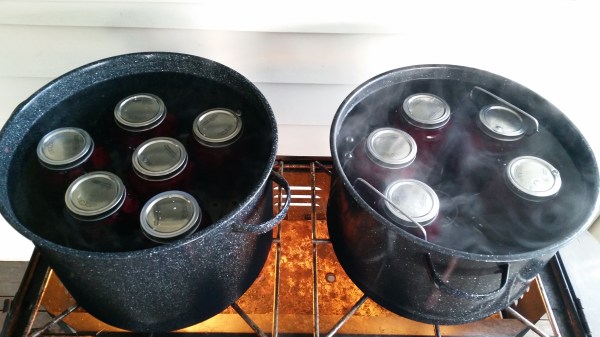
Place your jars in the pressure canner and put the lid on it.  Once it begins to steam, let it steam for 10 minutes then put the 10 lb pressure weight on and begin the timer.  Pressure can for 50 minutes.

We let our canners depressurize by themselves.  If you rush them, they will boil the water out of your jars.  I have left mine sitting over night before opening.

20160707_101023

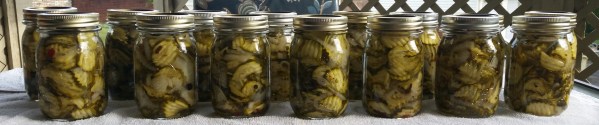
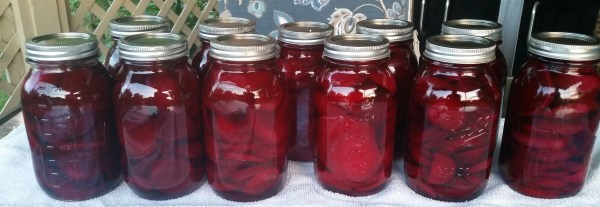
This project yielded 33 quarts.

Canning Spaghetti Sauce (with meat)

This is something that we can year round, based on when we run out. Between my father raising cattle and my boys being deer hunters, we always have ground meat in the freezer.  We prefer to use home canned tomato sauce, but in a pinch we have bought gallon containers of tomato sauce to use as a base.  I really like knowing what I’m eating and feeding my family so we try to stay away from anything processed or loaded with preservatives.

This recipe is what we used to make 14 quarts which fills 2 pressure canners.

Put sterile jars in the oven and turn on 200°.

  • 3 gallons of tomato sauce
  • 6 lbs of ground meat
  • 6 green peppers, diced
  • 2 onions, diced
  • 1 head of garlic, minced
  • 2 T Basil
  • 2 T Rosemary
  • 1 bottle of Oregano 0.75 oz, as pictured
  • 2 T Sugar
  • 1 c Beef Broth
  • Salt and Pepper to taste

I know what you’re thinking, sugar? Yes, sugar…it takes the bitter bite out of the tomato sauce.  We’ve played with this recipe alot, John’s one to say, add another garlic clove or two, throw in another tablespoon of Basil, or more Oregano.  We’ve added Bay Leaves before, but in this batch, we chose not to.  In the end, it’s delicious!

Dice the onions and peppers.  Cook the ground meat and drain any grease.  We use a big roasting pan to start cooking it, a stock pot works great too.

In a large pot or roaster, start heating the tomato sauce and spices.  Mix in the minced garlic, diced onions and diced green peppers.  Add the beef broth and ground meat. Simmer 30 minutes and allow all the spices to combine.  Taste test and add salt and pepper to your liking.

20160627_184754

Begin the water for your lids.  And start filling hot sterile jars.  We like to use a ladle to ladle the sauce into jars.

20160627_193255-1

Pressure can on 10 lbs of pressure for 90 minutes.  It contains meat, 90 minutes is a must.

Yields 14 qts.

20160702_084341-1

Canning Garlic Dill Pickles

Garlic Dill Pickles is probably one of my favorite kinds of pickles.  I’m not a fan of Mrs. Wages packs when it comes to Dill or Kosher pickles so I found a recipe that sounded similar to what I remember my grandmother making.

  • 3 lbs Cucumbers – quartered
  • Garlic, 1 lg clove per jar
  • Fresh Dill, 1 sprig per jar
  • Dill Seed
  • 6 c Water
  • 2 c White Vinegar
  • 1/4 c Pickling Salt

Place the clean, sterile jars in the oven and turn it on 200°.  Start the water bath canner so it’s boiling when your ready.  *Remember if your jars are hot, your water bath needs to be hot or boiling before placing the jars in it.  If the jars are cold, place the jars in the water bath canner before turning it on.

Wash the cucumbers really good and quarter them into spears.  If you prefer them whole, cut the stem and blossom ends off and leave them whole.  Peel the garlic.

In a stock pot, bring to a boil water, vinegar and pickling salt, stirring until the salt is dissolved.  Boil for 5 minutes.

Start the water for the lids.

Pack cucumbers into jars, add 1 large or 2 small garlic cloves and 1 sprig of dill.  If you don’t have fresh dill on hand, you can use 1 tablespoon of dill seed per jar.

20160625_210111-1

Sprinkle each jar with just a little bit of Dill Seed.

20160625_210229


20160625_210308-1

Fill each jar with vinegar mixture, leaving 1/2 inch head space.  Wipe the jar rims with a clean sterile cloth, place lids and rings on and tighten rings.  Water Bath for 10 minutes.  When water bathing, remember the jars must be submerged in the water.

20160626_070002

Let sit 2 weeks before opening.

Canning Bread and Butter Pickles

Most of our canning recipes are from scratch, but this is one where we do use a seasoning pack.  My husband says….”why mess up a good thing”…our family loves these pickles, so why change that recipe.  We do doctor the original recipe just a little bit.

  • 10 lbs of thinly sliced cucumbers
  • 6 3/4 c of white vinegar
  • 7 c sugar
  • 1 pouch of Mrs. Wages Bread and Butter Mix
  • 1 onion thinly sliced
  • 1 red bell pepper diced

Wash the cucumbers very well.  Thinly slice the cucumbers and onion and dice the red pepper.  We use a mandolin slicer for our cucumbers.

20160625_191548

Place the clean, sterile jars in the oven and turn it on 200°.  Start the water bath canner so it’s boiling when your ready.  *Remember if your jars are hot, your water bath needs to be hot or boiling before placing the jars in it.  If the jars are cold, place the jars in the water bath canner before turning it on.

Here’s the Mrs. Wages seasoning that we use:

20160625_190252-1

Bring to a boil the sugar, vinegar and spice pack until the sugar dissolves.   Stir often.

20160625_190920-1

Begin the water for your lids.

Start packing the cucumbers,  onions and peppers into the hot jars. (This is a family affair).  We pack cucumbers to about half then add peppers and onions, then fill with cucumbers.  The red peppers make for a pretty jar of pickles….

20160625_190755

PACK them good and tight or else when you add the liquid, they will float.  We have found it’s best to pack them tight, add some of the liquid, wait a minute or two, then add some more cucumbers. The hot liquid will cause the cucumbers to shrink just a little at first.

20160625_190817

Once you have the jars packed and the liquid boiling, begin adding the liquid to the jars, evenly.  Leave 1/2 inch head space.  If you run out of liquid, you can top off the jars with hot vinegar.  Remove the air bubbles.  Wipe the rims with a sterile cloth, place lids, tighten rings and water bath for 15 minutes.

20160626_065745

Once they’re done if they appear to float, no worries, all that means is they could have been packed just a little tighter, (we had some to do that).  Once they’re sealed, you can turn them over and shake them, they’ll break loose and make the jars look like they’re fuller.  These are ready to eat within 24 hrs.

We made 3 batches, used 3 packs of Mrs Wages and it made 21 qts.  We did have some of the liquid left over.  If you plan to make more pickles, the extra liquid can be stored in the refrigerator for up to one week and reheated for the next round of canning.  We do most of our canning on our back porch.  After water bathing, I place the canned goods on a towel and cover them with another towel to let them slowly cool and seal.  I love to hear them pop as they seal, it’s a sound of accomplishment after hours of hard work!


Canning Sweet Zucchini Pickles

This is the time of year when the zucchini is in full swing.  I’m blessed to have a Dad and Stepmom that raise a huge garden and share their extras with the family….After you’ve had your feel for the season and are “zucchini’d out” what do you do with the abundance? Make pickles of course!20160618_200208.jpg

  • Zucchini – 1 lb, thinly sliced
  • Onion – 1 small per lb of zucchini, thinly sliced
  • 2 Tablespoon Pickling Salt (or Kosher)
  • 1 1/2 Cup White Vinegar
  • 1 Cup Sugar
  • 1 1/2 teaspoons Pickling Spice

Here’s 8 lbs of zucchini. If you’ve never worked with zucchini, I recommend rubber gloves.  You’ll understand after you’ve cut several of them.

20160620_195525-1

Thinly slice the zucchinis.  I use a mandolin slicer, it makes for a pretty pickle..

20160620_203306-1

For each lb of zucchini you will need one small onion.  Thinly slice onions and put them on top of the zucchinis.  Add 2 tablespoons of pickling salt per lb of zucchini and cover with water.  Let sit at room temperature in a large nonreactive bowl for at least 2 hours.

20160621_102950-1

Jars need to be hot for packing, so at this point I place them in the oven and turn it on 200°.  Then I start the water for the lids.  Remember, don’t boil the lids, they just need to be dropped into the boiling water.

Measure out your vinegar, sugar and pickling spices.

20160621_193552

Mix those 3 ingredients together  and bring to a boil.

20160621_194529-1

Add zucchini and onions, simmer for 5 minutes.

20160621_200708

Ladle the zucchini and liquid into the jars up to the neck and remove all the air bubbles. Wipe the rim, place the hot lid and ring on the jar and tighten.  Water bath for 10 minutes.

For best flavor, let sit for one week before opening.  Keep in a cool place.

20160622_080252-1

This 8 lbs yielded 15 pints of pickles.


Canning Pickled Beets

From the garden to the jar – my crowd loves pickled beets!  And I am blessed to have a husband that likes to can them!

Anyone that knows my boys, knows that my lil man loves pickled beets…so much so, that at 4 yrs old he asks his Papa Troy to plant beets just for him!

Collage 2016-06-20 16_24_31

We start with one 5 gallon bucket of beets.  Wash the beets well.  Cook the beets until tender, then put them in ice water.  This will help release the skins.  Cut each end off of the beets,  peel and slice them.

FB_IMG_1466420219873

I recommend wearing rubber gloves. Beets are messy and will stain whatever they touch, so be careful.  I make sure to put old towels down in my kitchen and wash them promptly!  Beets were used by our ancestors to dye garments….(all the more reason why I like cooking mine outside).

FB_IMG_1466420209270-1

Jars need to be hot for packing, so at this point I place them in the oven and turn it on 200°.  Then I start the water for the lids.  Remember, don’t boil the lids, they just need to be dropped into the boiling water.

Combine the following ingredients in a stock pot and bring to a boil.  I add my ingredients in order as listed.

  1. 2 cups of water
  2. 9 cups of sugar
  3. 8 cups of vinegar
  4. 3 tablespoon of pickling salt

I have added cloves and cinnamon, but my crowd prefer them without the extra spices.  Once boiling,  reduce heat and simmer 15 minutes.  Pack beets in hot jars leaving a little head space at the neck. Pour hot liquid over beets. Remove air bubbles.

20160620_194508-1

Wipe down rim, place hot lid and ring. Tighten ring.  Water bath pints and/or quarts for 30 minutes.

20160620_195603

Tada….

20160620_203406-1

That 5 gallon bucket yielded 11 quarts.

Canning Pickled Peaches

I asked my father, what’s the one thing my grandmother used to can that people don’t can today.  Instantly, he said, pickled peaches.  That told me, he missed those peaches! And what better time to make them than right before Father’s Day.  I started searching cookbooks and my husband started searching the web for a recipe that sounded close.  I could remember the basics; such as, cinnamon, cloves, sugar and vinegar but needed a little reminding on the recipe.  With a little tweaking ~ we found it!  As the brine started to boil, my kitchen began to smell like Grandma’s and a flood of memories took over!  So here’s what we came up with:

  • Cling Stone Peaches – 1/2 bushel (peaches that won’t cut off of the stone easily)
  • 16 cups of sugar
  • 4 cups of white vinegar
  • 4 cups of water
  • Cinnamon Sticks – 1 per quart (optional)
  • Whole Cloves – 6 to 8 per quart

20160613_191753-1

This basket yielded 12 quarts.  Some people blanch the peaches but I peeled them; there’s less waste when they’re peeled.  As soon as the peaches are peeled, “treat” the peaches to keep them from turning brown in time.  To do this, put the peaches in a gallon of water mixed with 2 Tbsp salt, and 2 Tbsp vinegar.

20160613_212227

I split these into 2 batches, any more than that and you can’t cook the peaches in the stock pot as needed.

Bring to a boil 8 cups of sugar, 2 cups of vinegar and 2 cups of water.  Once this gets started, place jars in the oven and turn on 200°.

20160613_202135-1

Once at a good rolling boil, add about 40 peaches (1/2 of the basket) and continue to boil for 20 minutes.  At this point, I start my water for the lids.  It’s important to get that water to a boil and place the lids in it, but don’t boil the lids.

20160613_202137-1

Place peaches and brine in hot quart jars.  Fill to the neck, leaving about an inch head space. Add 1 stick of cinnamon and 6 to 8 cloves to each jar.  Wipe the rims with a sterile clean cloth.  Place hot lids on the jars and tighten down rings.  Water bath 10 minutes.

20160614_064957-1

These are a sweet treat and great to eat by themselves or over ice cream.  It had been so long since I had these that I had to sample some just as soon as I could…..I stepped back in time about 10 years!


Canning Strawberries

20160528_084630

Around the holidays (or any special occasion) wouldn’t it be nice to have really good strawberries over hot pound cake or ice cream? Local Strawberries, where you likely know the farmers by name; not strawberries from another country.  These are a real treat, loaded with sugar, so I indulge in them on rare occasions.

Here’s a quick and easy way to can strawberries for year round enjoyment.

These have to sit over night in a cool place or refrigerator to absorb sugar and create their own juice.

  • 20 cups of capped, washed FIRM strawberries.
  • 7 cups of sugar
  • 1 T Lemon juice

20160528_064736-1

Mix sugar and berries together and refrigate overnight. The next day when you’re ready to can them, turn the oven on low to heat jars and boil water to top off jars, if needed.  Start boiling water for lids. In a pot, heat berries and 1 T Lemon juice over low until all sugar is dissolved and berries are warm.  Spoon dual amounts of berries into jars and top off with boiling water, if needed.  I fill mine to the neck of the jar.  Wipe rims, place hot lid and tighten down the ring.

Water bath for 10 mins.

Berries will loose their color, but not their flavor!

Yields 10 pints.

Canning Strawberry Rhubarb Pie Filling

20160528_075026-1

  • 4 qts Rhubarb, diced
  • 4 qts of Strawberries, chopped
  • 6 Cups Sugar
  • 7 Cups Water
  • 2  & 1/2 Cups of Clear Jel
  • 3/4 Cup Lemon Juice

Be sure to cut all leaves and the ends off the rhubarb.  Trim it good and cut into 1/2″ chunks.  Also, cut the strawberries in to at least quarters depending on their size.

20160527_192307

Over low heat, mix water, lemon juice, sugar and clear jel. (I purchase mine from an Amish store, you can find it online).

20160527_203909

Stir mixture constantly, it will thicken in a hurry, so stir continuously to keep it from sticking.  Once thickened, remove from heat, add rhubarb and strawberries.

20160527_213615

Mix well and pack in cold sterile jars.  Be sure not to fill above the neck of the jar or during water bathing it will bubble out and down the jar if you over fill.  Once the jars are filled, wipe down rims, place hot lids on jars, tighten down rings.  Start the jars off in canners of room temperature water.  (When the food isn’t boiling I pack my food in cold jars and start my canners off cold.

Water bath 25 mins.

Canning Pintos

Canning Pintos – super easy and a huge time saver!  It’s nice to have them cooked and on hand.  There’s no waiting for a crockpot to cook all night or waiting to cook them for dinner.  Simply open a jar, heat and enjoy.

Recipe per quart:

  • 1 Cup of Dry Beans – these are Mixed Beans and Pintos
  • 1 tsp of Canning/Pickling Salt
  • 1 Piece of Ham (this pack makes 14 quarts)

Country Ham Chips

Remember – 7 jars will fit in the canner.  Layer in the dry sterile jars – 1 cup of beans, 1 piece of ham and 1 tsp of canning salt.  If you put the ham on the bottom, it leave a residue on the jar that will make them harder to clean.

FB_IMG_1464348622739

Fill each jar with warm water.  Wipe rims with a sterile cloth, place the boiled lids and seal.  Pressure can Pints – 1 hour, 15 minutes, Quarts – 1 hour, 30 minutes.

FB_IMG_1464348604073

This is what they look like as soon as they come out of the canner.  The longer they sit, the more they thicken.  I have found that if you have time to soak your beans over night that they do fill the jars more than if you can them dry.