Squash Casserole

People shake their heads at me when I say I can squash…..but when you love a recipe like squash casserole, you’ll figure out a way to preserve the summer harvest so you can have this delicious dish year round!  This is another one of my grandma’s recipes that the family enjoys….

20161124_093829-1

  • 3 cups of cooked squash drained (I use what I canned over the summer.)
  • 1 medium onion chopped
  • 1/4 cup of butter
  • 1 egg beaten
  • 1 cup shredded cheddar cheese

Cook onions in the butter until tender.

20161124_094351-1

Combine the squash, cooked onions, shredded cheese and beaten egg in a greased casserole dish.

20170415_083044-1

Preheat the oven to 325 degrees.  (This temperature really surprises me, if you knew my grandmother, you know that she cooked everything on HIGH and 350 degrees).

Combine the topping and sprinkle over the top of the casserole.

Topping:

  • 1 1/2 cup herb stuffing mix
  • 1/2 stick of butter, melted

20161124_101247-1

Bake at 325 for 35-40 minutes.  Enjoy!


Scalloped Corn

As Easter approaches I begin reminiscing of years past, family dinners, egg hunts and Grandma’s kitchen.  I miss that lady….she was truly one of a kind.   My grandma used to make this on a regular basis, especially during the holidays.  Some call it corn casserole, she always called it scalloped corn.  So when we want to take a walk down memory lane and feel like we have a part of her with us on special occasions we bring out our Grandma Marshall cookbook and begin cooking, baking and working in the kitchen.  She was happiest in the kitchen feeding others and I would like to think that others view my kitchen the same…..

20161124_092019

This recipe serves 5-6.  So for crowds, I recommend that you double it.  Preheat the oven to 350 degrees.

  • 2 cups corn
  • 1 cup milk
  • 2 eggs beaten
  • 1 tsp salt
  • 2 tablespoon butter
  • 2 tablespoon self rising flour
  • 2 tablespoon sugar
  • 1/8 teaspoon pepper

Combine all ingredients.  Pour into a sprayed baking dish.

20161124_101235-1

Bake at 350 degrees for 30 minutes.

20161124_110909-1

Enjoy!!!

Mexican Casserole

One of my all time favorite foods is anything Mexican.  When I was pregnant with my youngest son I ate it 5 days a week, 6 and 7 when I could talk my husband into it.  I love this casserole both by itself or with a salad.

20170314_160220

  • 1 lb Ground beef, lean, browned
  • 1 (15 ounce) can Black beans, drained and rinsed
  • 1 (15 ounce) can Corn, kernel, drained
  • 1/4 cup Jalapeno, canned slices (I used Jalepenos that I canned)
  • Small Onion, diced
  • 2 cups fresh tomatoes, chopped
  • 1/3 bunch Cilantro, fresh
  • 1 (1 1/4 ounce) package Taco seasoning mix
  • 8 Corn tortillas
  • 1/3 cup Shredded Cheese, (I shred my own)
  • 3/4 cup Sour cream, nonfat or Greek Yogurt
Brown ground beef and onions in large skillet until thoroughly cooked. Drain well and rinse with warm water to remove all fat.  Put the beef and onions back in the skillet.  Add the corn, black beans, tomatoes, jalapenos and taco seasoning to the ground beef and onions and mix well.  Simmer for 5 minutes.

20170314_163357

Meanwhile spray 2-quart baking dish with nonstick cooking spray. Cut each tortilla in half and place 8 of the halves in bottom of the baking dish, overlapping where needed.

Spoon half of beef mixture evenly over tortillas. Spread the sour cream over beef mixture evenly. Repeat the tortilla halves and beef mixture. Cover tightly with foil and bake on 350 degrees for 25 minutes.  Remove from the oven and sprinkle with cheese, cover and let sit until the cheese melts. Sprinkle with chopped cilantro and serve with fresh chopped lettuce, tomatoes, salsa, black olives, etc…

20170314_194820

Some of my boys are not cilantro fans….that’s why the cilantro isn’t on the whole thing.

Enjoy!


Cream of “Something” Soup Base

It never fails when I need Cream of Chicken or Cream of Mushroom Soup I never have any on hand.  I decided that I would do some digging and find a recipe for a soup base so I could make my own as I needed it.  After I read the ingredients on the last can of soup that I bought at the supermarket, I cringed.  There’s so many hidden ingredients in processed foods.   At least now, I’m one step closer to knowing what’s in it.  This is super easy to make.

Add all the ingredients to a large mixing bowl.  Whisk the ingredients together really well.

  • 2 cups dry milk powder
  • ¾ cup cornstarch
  • 1 teaspoon onion powder
  • ½ teaspoon garlic powder
  • ½ teaspoon dried basil
  • ½ teaspoon dried parsley
  • ¼ teaspoon black pepper


20170314_090726

Using a funnel, pour the mixture into an airtight container.

20170314_092903

Label the jar with the directions and measurements to make the soup base.

20170314_093152

To make into 1 can of condensed cream of soup:

  1. Combine 1/3 cup dry mix with 1 ¼ cups water or broth of choice in a small saucepan. Whisk until smooth.
  2. On medium heat, bring to a boil.
  3. Cook and stir for 2 minutes, until thick. Cool.

Cream of Chicken Soup: use 1 ¼ cups chicken broth instead of water.

Cream of Celery Soup: use water, add ¼ cup diced, cooked celery to the thickened soup.

Cream of Mushroom Soup:  use water; add ¼ cup diced, cooked mushrooms to the thickened soup.

Enjoy!


Peanut Butter Chocolate Chip Cookie Bars

Ok, so the title says that these are Peanut Butter Chocolate Chip Cookie Bars but what the title doesn’t tell you is the main ingredient is CHICKPEAS!  And that they’re SOOOOOO GOOD!

20170314_105540

  • 1 can chickpeas, rinsed & drained
  • ½ cup peanut butter, can substitue 1/2 c peanut butter made from PB2
  • ¾ cup maple syrup
  • 2 tsp vanilla
  • ¼ teaspoon baking powder
  • ¼ teaspoon baking soda
  • ¾ cups dark chocolate chips, reserve 1/2 for the top
  • pinch sea salt

Preheat the oven to 350 degrees.  Either spray your loaf pan really well with a non stick spray or line it with parchment paper

20170314_114327

In my blender, add the chickpeas, maple syrup, peanut butter, vanilla, baking powder, baking soda and salt.  Blend until the mixture is smooth.  I put the batter in the pan and added 1/2 of the chocolate chips and stirred those in real well.

I sprinkled the remaining chocolate chips on the top.  Bake 1 hour or until a tooth pick comes out clean and the edges are brown and crisp.  Let them cool completely before cutting into squares.

I took this to a meeting with several of my lady friends.  If I hadn’t told them that this was made with chickpeas, they would have never known that this was healthy dessert.  20170314_130720-1

Enjoy!!!!

Canning French Onion Soup

Bye Bye Lipton’s Onion Soup mix, I think I will use French Onion Soup for my roast base from now on….besides who really knows what’s in those dehydrated dust packets?!

I love any kind of soup and this one works somewhat as a multi-purpose soup in my household.  One that I can eat straight out of the jar or one that I can use as a base for cooking.  I hate using one of those “onion soup” packets that has no telling what in it.

This took just a few minutes to throw together and it yielded 10 pints.  Before I started slicing the onions, I placed my sterile jars in the oven on 200 degrees to get them to the desired heat before canning.

20170226_133734-1

  • 2 Tablespoons of butter
  • 7 or 8 medium onions, sliced
  • 3 garlic cloves, minced

Peel and slice the onions.  I cooked mine in a cast iron pan with a little bit of butter, cook them until the onions are tender then mix in the minced garlic.  In a large saucepan, I mixed together the following soup base:

  • 12 cups of beef broth (that I made from Better than Bouillon Beef Paste)
  • 2 tablespoons of A1 Steak Sauce
  • 2 teaspoons of canning salt

20170226_140929

Spoon the onions evenly into the 10 hot sterile pint jars.

20170226_141646-1

Then fill the jars with the hot broth mixture leaving 1 inch head space.

20170226_142322-1

Wipe the rims with a sterile cloth.  Place a hot lid and ring on each jar and tighten.  Pressure can on 10 lbs of pressure; pints 60 minutes and quart for 75 minutes.

Enjoy!

Canned Baked Beans

I love knowing what I’m eating and what I’m feeding my boys.  When I started through the cabinet to see what I still had left in processed cans, it was clear that I needed to learn Bush’s secret….so here’s what we came up with for baked beans.

20170218_214939

I have doubled the recipe below, used some pints, some quarts and ended up with 7 quarts and 5 pints of baked beans.
  • 2 lbs of dried Navy Beans
  • 2 medium onions, chopped
  • Country Ham Trimmings (OR 1/2 Teaspoon of salt per pint)
  • 2 – 15 oz cans of tomato sauce
  • 1/4 cup brown sugar
  • 3/4 teaspoon prepared mustard
  • 2 tablespoons molasses (can use honey or corn syrup, any type of liquid sweetner)
  • 3 cups water

In a large stock pot mix together the tomato sauce, brown sugar, mustard, molasses and water to create a hot tomato sauce mixture.  Bring to a boil and stir often, until all the ingredients are dissolved.

In each hot, sterilized pint jar add 1/2 cup dry beans, 2-3 Tablespoons of onion and 1 piece of ham trimmings.  **I don’t soak my beans overnight like some folks, I do rinse them right before I put them in the jars.

20170221_204459

Add 1 cup of hot tomato sauce mixture that you just brought to a boil to each jar of beans.  Fill the balance of the jars with boiling water, leaving one inch headspace.  This is important as the beans will swell in processing.

20170221_205323

Wipe each jar rim with a damp sterile cloth, place hot lids and rings and tighten to fingertip tightness.  Pressure can pints for 75 minutes at 10 lbs of pressure, quarts 90 minutes.

After processing, allow the canner to cool and depressurize naturally before removing the jars.  Once removed I place my jars on a towel, cover and listen for the victory PING!


20170221_233735-1

One step closer to ZERO processed foods…..

Canning Coffee Creamer – Vanilla

When a pandemic hits and I can’t find my favorite coffee creamer in the grocery store, I don’t fret, simply make my own.

Those that know me, know I LOVE coffee….that’s probably my one true addiction.  I don’t love it for the caffeine high, I love it for the rich, creamy flavor. When I mentioned canning creamer to my friends and family, the look some of them gave me was hysterical and their first words were – Why?  Mine were more like – Why Not?  Creamer is a tricky one….so much can be hidden in the “Natural Ingredients” on the labels. By making and canning my own, I’m at least one step closer to knowing what is in it.  I could never find a true “canned creamer” recipe online so I started searching for creamer recipes, canned milk instructions, combined the two and then started researching.  The results are below….I hope you guys enjoy this as much as I have because it realllly is good!

20170205_075232-1

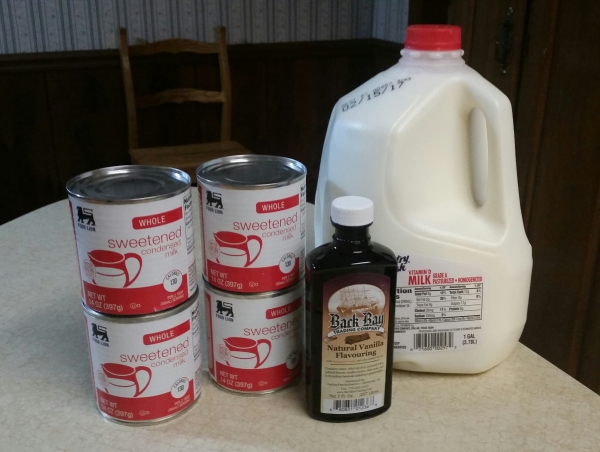
  • 4 – 14oz Sweetened Condensed Milk
  • 4 – 1  3/4 Cups of Milk (Whole, 2%, Skim, Almond, your choice)
  • 4 – 2 teaspoons of Vanilla Extract

(I took the original recipe and multiplied it by 4).  When I can – I can BIG!

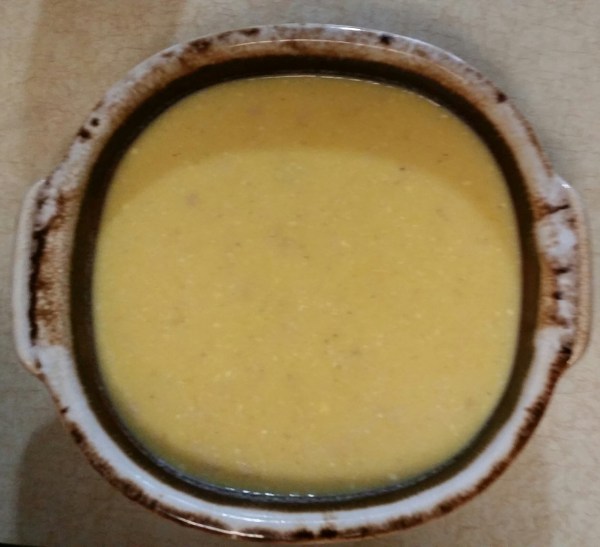
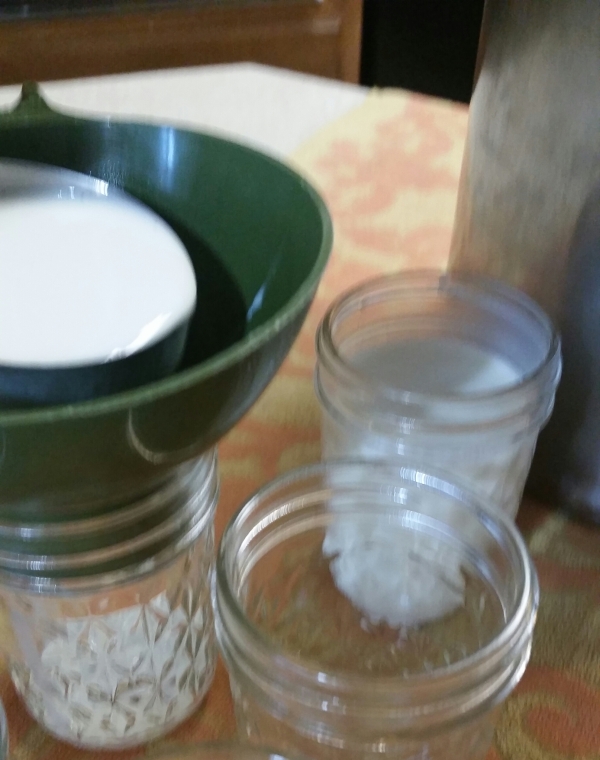
Mix these ingredients REALLY GOOD!

20170205_080252-1

Begin a pot of boiling water for the lids.  Start out with dry, cold jars.  Fill with the creamer and wipe the rims with a sterile cloth.  **Leave 1 inch headspace,  you need room to shake it REALLLLY GOOD before opening!

20170205_080611-1

Place the hot lids and rings.  Place in a cold pressure canner, set the lid and turn it on. Wait until pressure builds and the steam vents for 10 minutes before you put the weight on the canner.  Set a 10 lb weight on the canner.  As soon as it begins to jiggle, and the pressure is at 10 lbs, cut the heat off – immediately – and let the canner cool and depressurize.  Remove the jars, wipe them off, cover and let them continue to cool.  Once they have all sealed you’re good to remove the rings and put them away in a cool dark place for storage.  (YEAH! No more weekly trips to the grocery store for creamer!)

This recipe yielded 15 of the 8 oz jelly jars.

This recipe is not for the calorie counters – if you’re counting calories, I’d try almond milk and even a lower fat sweetened condensed milk.

Several recipes I found online used different flavors instead of vanilla.  Some extracts to try….:

  • Coconut
  • Peppermint
  • Hazelnut
  • Almond
  • Cinnamon
  • Pumpkin Pie Spice

Enjoy!


Avocado Feta Salsa – Oh My….

20170205_191613

This stuff is sinful – as in hold the chips – just give me a spoon!!!  I’ve had it with chips, but love it by itself and even on a salad!  And the coolest part – it’s really easy to make.

  • 1 avocado diced
  • 2 Roma tomatoes seeded and diced
  • 1 clove of garlic minced
  • 1/4 of a red onion diced
  • 4 oz of feta cheese crumbles
  • 1 tablespoon of Parsley flakes
  • 1 tablespoon of Oregano
  • 2 tablespoons of Red Wine Vinegar
  • 2 tablespoons of Olive Oil

This is so easy….it’s literally, slice, dice, chop, mix and ENJOY!


Sloppy Joes – Skinny Style….

I am all for quick and easy.  It doesn’t get any quicker than browning burger or easier than mixing a few ingredients together.  I ran across this recipe and thought I’d give it a shot.  It’s really good and much leaner and better for you than some I’ve made before.

20170115_170243-1

You all know I’m not a fan of processed foods, so eventually I plan to make this with my own sauce and paste (GOALS)….gotta keep those Goals in from of me!  Ok here’s for simple and easy.

  • 1 pound of ground turkey (or venison)
  • 15 oz tomato sauce
  • 6 oz tomato paste
  • 2 1/2 tbsp honey or maple syrup
  • 1/2 tbsp garlic powder
  • 1/2 tbsp chili powder
  • 1/4 tsp garlic salt
  • 1/4 tsp salt

In a large sauce pan, brown the ground meat until completely cooked.  In a mixing bowl, stir in all ingredients. Once mixed, add to the ground meat and heat on low for 5 minutes.  Ready to serve!

20170115_171412


Forget the bread, add a side of jasmine rice and something green and enjoy!

Nutritional Information:  5 Servings at 243 calories each.  Protein 31 grams, Carbohydrates 23 grams and Fat 3 grams.