Monthly Archives: August 2016

Concord Grape Jam

I’m a jam lover, I prefer jam over jelly any day, and this one is the best we’ve made so far!

20160828_074259-1-1

Wash the grapes really well and weight the grapes. For every pound of grapes you have, you will need 1 cup of sugar.   I ended up with 7.5 lbs.

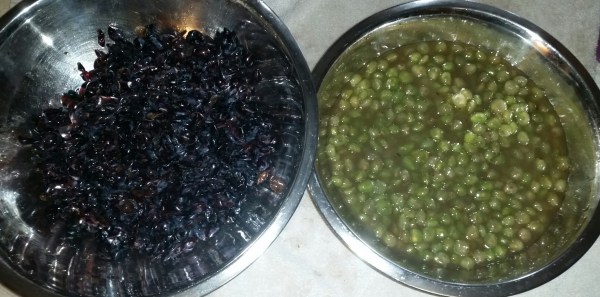
Separate the grape pulps from the hulls.

20160828_081807-1

Place the jars in the oven on 250 degrees, you will average needing 2 jars per 1 lb of grapes. Begin boiling water for lids.

Cook the grape pulps over medium heat for 5 minutes until it’s at a good steady boil.

20160831_075446-1

Then remove from heat and using a wooden spoon press the pulp through a strainer to separate the seeds.  Discard the seeds.

20160828_083918

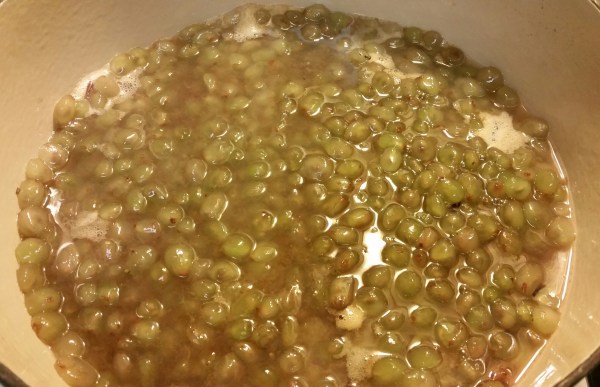
Add the grape hulls to the grape pulp and cook over medium heat until the grape mixture is at steady boil.  At this point the grape hulls will begin to break down.  Slowly begin adding in the sugar a cup at a time.  Cook the jam until it’s the consistency you prefer.

20160828_091010-1

You can test the consistency of the jam three different ways, temperature, spoon or refrigerator.

Refrigerator Test – My favorite. I place a plate in the freezer and remove it when I’m ready to test my jam. I pour a sample of the boiling jam on this plate and let it sit in the fridge for just a few seconds. If the jam gels, it’s done. If it’s runny and it doesn’t have any form to it, then continue to cook the jam for few more minutes until it gels after a few seconds in the fridge.

Temperature – Using a candy thermometer, place it vertically in the jam and make sure not to touch the bottom of the pot.  If the temperature reads 220ºF (or 104ºC), then the Jam is done.

Spoon Test – Dip a cool metal spoon into the boiling Jam mixture. When you lift the spoon, if the Jam runs off the spoon like a syrup, then the Jam needs more cooking time. But if it is heavier and drops like a sheet off the spoon instead of dripping then the Jam is done.

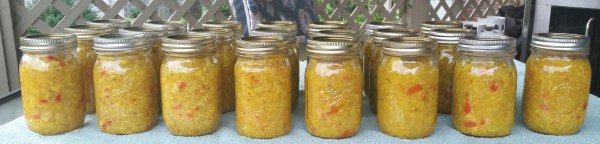
Once you test the jam and it’s ready to jar up, put the jam in hot jars leaving 1/2 in head space.  Place the hot lid and ring on, tighten.  Water bath for 10 minutes.

Raw Local Honey vs Pasturized Store Bought Honey

Let me start by saying I am no bee/honey expert,  by no means.  Some of you reading this know a lot more about it than I do  ~ I won’t call your by name. Growing up, my grandfather had honey bees and my Daddy has them today.  I’ve been around them my whole life, and as you can see from some of the picture I’ve taken, bees don’t bother me.  With that being said….What I do know is there’s some pretty awesome health benefits to the real stuff….the sweet liquid gold that you get locally – NOT store bought.  Store bought isn’t much more than a sweet tasting honey like syrup that might help your cough.  I will admit, I have grabbed a honey bear or two before, due to poor planning on my part, but not anymore!

20160624_074414-1.jpg

Did you know there’s tons of health benefits hidden in that extra sweetness of your local raw honey?!  “Local” and “Raw” are the key words.  Bees use pollen from anything that blooms to make the honey.  They spend 1000s of hours collecting pollen from nearly 2 million flowers to make 1 lb of honey.  The pollen used in making the honey allows it to help you build antibodies to counter act pollen allergies.  Honey contains natural antioxidants, enzymes and minerals; such as, iron, zinc, potassium, calcium, magnesium and Vitamin B6.  When you buy “honey bears” or honey from the store, you lose all these health benefits.  Honey purchased in chain stores is so highly processed that the high temperatures destroy the natural enzymes, vitamins and minerals.  There’s no trace of pollen and the #1 ingredient is High Fructose Corn Syrup “aka” the devil….that stuff is BAD!  Even my children will tell you it’s bad stuff.

388334a058067cd90744144bf876a897

Did you know 1 tablespoon of honey contains 17 carbs and 64 calories but will not spike your blood sugar like white sugar?  It is the most nutrient dense food known to man. It helps lower blood pressure and blood sugar.  It boosts the immune system and helps the digestive system.  It boosts energy and memory,  promotes weight loss,  and helps prevent cancer and heart disease. It’s GOOD stuff!  Not to mention it’s been around  forever!  Warned about in the Bible (Proverbs 25:16) and discovered in ancient pyramids.  The honey found in the pyramids is still good today, good because it doesn’t spoil!  Bacteria doesn’t grow in acidic foods or super saturated sugar and honey is both!

61fa283c2d4d21c8fcc6de27644d97f4

When used in cooking it is a healthy alternative to sugar and doesn’t require as much.  If the recipe calls for 1 cup of sugar, reduce it to 2/3 – 3/4 cup of honey and reduce the cooking temperature by 25 degrees.

When working bees, it’s best to wear protective clothing.  Clothing types vary. Shanny wears a bee keeper’s hat with a veil and a jacket, her father wears a complete suit and my Dad wears just the hat and veil.  They all vary and each is simply a preference.

Collage 2016-06-23 08_34_13-1-1-1

Here’s pictures of Daddy working his bees.  Checking the hives to see if any are ready for harvesting.

Collage 2016-06-23 07_04_00

Some are just getting started and some are REALLY close to harvesting!

Collage 2016-06-23 07_02_05


The rack below is one of ten in the box called a “Super”.  It weighs approximately 3 lbs and is as fresh as it gets.  This pictured is spring honey.  Think about that just a second, 3 lbs….and it takes those bees nearly 2 million flowers to make just 1 lb – wow – that’s alot of flowers!

20160528_155306-1

Honey trimmed off of an edge.  Delicious!!!!  It literally melts in your mouth as you chew that sweetness.

20160528_155137-1

This is the “Super”, see all those edges, my kids will stand in line for this!!!  An average Super should produce roughly 5 gallons of honey.

20160528_155159-1

Dad’s bee hives.

20160528_162504-1

This swarm out grew their home, it happens when it’s full of honey!!!  That’s where Dad grabbed the “Super” of honey.

20160528_162441

Honey that my father collected from one of his hives.

20160528_161919

Finished product!!!  It’s delicious and one of the few things Dad never sells….with four girls, we leave little to spare….

Freezing Corn – Made EASY!

Some boil it, some “blanch” it, I keep it simple and use a tried and true method that I learned from my grandmother.

Shuck and silk the corn, wash it thoroughly to remove all the silks.

20160823_202828

Place the corn in a Freezer Ziploc Bag.  I use gallon size bags and place 5-6 ears of corn in each bag because that is what my family will eat in one sitting.  I have friends that use quart size bags and only 2 ears, whichever you prefer.

20160823_203714

Once all the ears are in bags, the fun begins!  I take a straw and literally suck all of the air out of the bags to give it a vacuum seal affect.

20160823_203901-1

Once sealed, I freeze.  When I’m ready to eat, I place the ears in boiling water and boil for 20-30 minutes until done.

Roasted Sweet Potatoes and Brussels Sprouts

I have to admit, sweet potatoes and brussels sprouts did not sound appetizing at first, but I thought I would at least give it a try.  I’m SOOOOO GLAD I DID! My boys loved it.  It’s nutritious and delicious and it’s even great the next day.

20160817_160447

Preheat oven for 400°.

  • 2 – 12 oz bags of frozen Brussels Sprouts, Thawed
  • 3 – Medium Sweet Potatoes, Diced
  • 3 – cloves of garlic, minced
  • Thyme, fresh for garnish
  • 1/2 tsp Garlic Salt
  • 2 tsp Cumin
  • 1 tsp Salt
  • 1 tsp Pepper
  • 1/3 cup – Olive Oil
  • 2 Tbsp – Red Wine Vinegar

Dice the sweet potatoes and put them in a large bowl.  You can peel them if you choose, I don’t peel mine.  The peeling is where the nutrients are hidden.   Add the brussels sprouts to the bowl.  Add the minced garlic and olive oil, stir.  Add the cumin, garlic salt, salt, pepper and stir to coat.    Spray a roasting pan really good with nonstick spray.  Pour the veggies on the pan and roast for 40-45 mins.

20160817_162437

I do stir mine occasionally while roasting.  The veggies are done when they’re tender enough that you can slide a fork into them easily.  Once done, put the veggies in a large mixing bowl and toss with the 2 Tbsp of red wine vinegar.  Garnish with Thyme, if you prefer.    This makes a great side dish!

Canning Green Peas

My goal this year is to buy as few canned goods as possible from the grocery store because I like knowing what I’m feeding my family.  You’ll notice that I can lots of different beans because beans are a common thing at my house.  As I started searching through my pantry, looking for things that I normally buy that I could replace with things more wholesome, it was safe to say that Green Peas should be at the top of the list.

Turn the oven on 200° to get your jars hot. Start a pot of boiling water to add to jars and a pot of water to boil lids.  Rinse peas really well.

20160807_134613-1

Measure a half cup of dry beans per pint jar.

Add one half teaspoon canning salt per jar.

20160807_135326

Fill with boiling water, leaving one inch head space.  Wipe the rims with a sterile cloth, place hot lids and tighten down rings.

20160807_140117

Place in pressure canner, put the lid on and wait for it to steam.  Once it begins steaming, let it steam for 10 minutes before putting the weight on it.  Then once the weight begins to jiggle, start the timer for 75 minutes.

We use 10 lbs of pressure based on our elevation.  Your elevation will determine to weight of pressure that you use. Please refer to Ball guidelines for reference.

There’s a local produce stand that I like to buy my dry beans from.  If you’re local, check out B&B Produce on 52, they have a large variety of dry beans!


Canning Cranberry “October” Beans

Some call them Cranberry,  some call them October,  I call them good!!!  When I have a hankering to can and can’t put my hands on something fresh, I head to my local produce stand and grab a few pounds of dry beans. If you’re local, check out B&B Produce on 52, they have a large variety of dry beans!  This makes dinner in the future – quick and painless!

Turn the oven on 200° to get your jars hot. Start a pot of boiling water to add to jars and a pot of water to boil lids.  Rinse the beans really well.

Measure a cup of dry beans per quart jar.  Add one teaspoon canning salt and a small piece of country ham to each quart jar.  I can these in quarts since they’re so similar to pintos and my boys can easily eat a quart at a time.

20160807_180310

Fill with boiling water, leaving one inch head space.  Wipe the rims with a sterile cloth, place hot lids and tighten down rings.

20160807_181510

Place in pressure canner, put the lid on and wait for it to steam.  Once it begins steaming, let it steam for 10 minutes before putting the weight on it.  Then once the weight begins to jiggle, start the timer for 90 minutes.  (Pints – 1 hour, 15 minutes, Quarts – 1 hour, 30 minutes).

We use 10 lbs of pressure based on our elevation.  Your elevation will determine to weight of pressure that you use. Please refer to Ball guidelines for reference.

20160807_215310


Canning Squash Relish

Compared to Chow Chow, this makes a great addition to a pinto bean dinner….pintos, cornbread, pickled beets…and squash relish – YUM!  Makes me hungry just thinking about it.

When I went searching for a recipe, my cousin said, “You’ve gotta try the squash relish that Mama and Michael make”.  Thank you Rachel and Micheal Marion for sharing your recipe!

Collage 2016-07-09 07_44_27

I love Michael’s sense of humor, “Place in jars, NOT OPTIONAL”…..’

20160709_200916

I made two batches, one with squash, one with zucchini.  Finely chop the squash or zucchini, onion, and red and green bell peppers (hot peppers if desired).  Add them to a large bowl and sprinkle with salt.  Combine really good and allow the vegetables to drain for about 1 hour.  Discard juice.

20160710_212251

Add sugar, salt, vinegar, celery seeds and turmeric and bring to a boil over medium heat.  Stir occasionally to help dissolve the sugar.  Simmer 10-15 minutes.

20160710_212302

Place the jars in the oven on 200 ° and start a pot of boiling water for the lids. Pack the squash relish into the hot, sterilized jars, filling the jars to within 1/4 inch of the top. Run a knife or a thin spatula around the insides of the jars after they have been filled to remove any air bubbles. Wipe the rims of the jars with a sterile cloth to remove any food residue. Top with lids, and screw on rings.

Waterbath for 10 minutes.   Place a rack in the bottom of a large canner and fill halfway with water. Bring to a boil over high heat, then carefully lower the jars into the pot. Pour in more boiling water if necessary until the water is at least 1 inch above the tops of the jars. Bring the water to a full boil, cover the pot, and waterbath for 10 minutes, or the time recommended for your area.

20160711_071820-1