Category Archives: Uncategorized

Canning Pintos

Anytime you have a day to spend at home – Pintos are a quick and easy to do! It took me literally 30 mins to get 21 quarts in canners and the rest was simply checking in on them…..

Preserving the Good Life

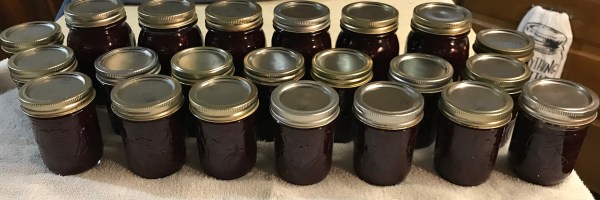
Canning Pintos – super easy and a huge time saver!  It’s nice to have them cooked and on hand.  There’s no waiting for a crockpot to cook all night or waiting to cook them for dinner.  Simply open a jar, heat and enjoy.

Recipe per quart:

  • 1 Cup of Dry Beans – these are Mixed Beans and Pintos
  • 1 tsp of Canning/Pickling Salt
  • 1 Piece of Ham (this pack makes 14 quarts)

Country Ham Chips

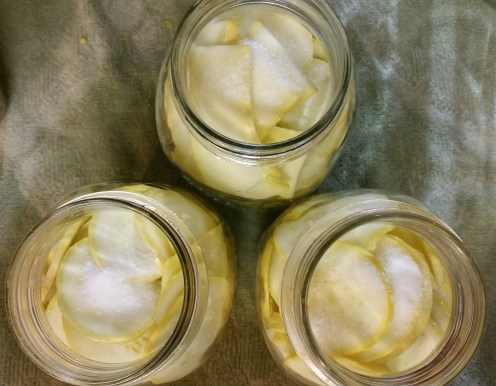
Remember – 7 jars will fit in the canner.  Layer in the dry sterile jars – 1 cup of beans, 1 piece of ham and 1 tsp of canning salt.  If you put the ham on the bottom, it leave a residue on the jar that will make them harder to clean.

FB_IMG_1464348622739

Fill each jar with warm water.  Wipe rims with a sterile cloth, place the boiled lids and seal.  Pressure can Pints – 1 hour, 15 minutes…

View original post 56 more words

Canning Green Beans

Preserving the Good Life

Canning green beans is almost like a tradition at my house each year.  My crowd eats an average of 100 quarts of green beans per year, that’s 5 bushels of beans!  And I’ve gotta say, there’s no way I could can them working 55 hours a week if it weren’t for my wonderful in-laws that do all the stringing and breaking of the beans for me!

20160716_183837

So here goes…..

String and break the beans, wash thoroughly.

20160714_190449

Turn the oven on 200°  and heat the jars.  Start water for jars and water for lids.  Pack hot jars with raw beans, pack tight!!!  Be sure to leave 1 inch head space.  Add 1 tsp of canning salt.

20160714_191033-1

Fill with boiling water, wipe rims with sterile cloth, place lid, ring and tighten.

Place in pressure canner, put the lid on and wait for it to steam.

20160714_193213

Once it begins steaming, let it steam…

View original post 59 more words

Canning Squash

Squash Season is here!

Preserving the Good Life

If you like stewed squash, squash casserole or squash and onions, this is a canning recipe you don’t want to miss.  Some will say that they don’t recommend canning squash, but I will share with you what my family has done for generations and it works.  This squash is great in casseroles, by itself stewed and even stewed with onions.  When we can, we can big, there’s 25 lb of squash in each side of the sink.

20160706_185448

Slice squash into thin slices.

Preheat the oven to 200° and heat the jars.  Begin a pot of boiling water to add to the jars.  Start a pressure canner with 2 quarts of water.  Start the water for your lids.  Once the lid water boils, drop the lids in and turn that water off. 

20160706_201931-1

Pack squash into hot jars.  Add 1 teaspoon of canning salt per jar.

20160706_203116-1

Fill each jar with boiling…

View original post 131 more words

Strawberry Pie Filling

***Be sure to allow extra head space when using Clear Jel***

Preserving the Good Life

This comes in so handy when you need a quick dessert for a get together or last minute guests.  Open a jar of Strawberry Pie Filling, pour it into a pie crust, bake and you’ve got Strawberry Pie in no time!
This recipe, as listed below, yields 4 quarts.  As always, I canned big.  I more than doubled the recipe and it yielded 10 qts.
 20170522_201145
Ingredients for 4 qts:
  • 16 cups (4 lbs.) strawberries, sliced
  • 3 1/2 cups white sugar
  • 1 1/4 cup Clear Jel, can be purchased from most local Amish Stores.
  • 4 cups water
  • 4 1/2 Tablespoons lemon juice
Slice strawberries and set aside.  I got really lucky this time!  I had a friend to call me and ask if I could use some strawberries.  She’d worked herself sick of strawberries that week!  She had some that she was ready to throw out; not because they were…

View original post 294 more words

Canning Greens

Preserving the Good Life

‘Tis the season for greens, collards, kale, turnips.

This is a whole lot of work for a little yield…BUT it’s hard to beat home grown greens in the off season!  And these turned out SOOOOO good that I decided I needed to go back and pick more!   They seem to wilt down to nothing so don’t be surprised when it takes 4 grocery bags to yield 12 pints.

Here’s how we worked these up for canning:

Cook the greens down.  We put ours in a stock pot, filled 1/4 full with chicken broth and water, 1/2 broth, 1/2 water.  Let them simmer down until all the liquid was gone and the greens were tender.

Put jars in the oven for 200 degrees to get them hot while the greens are cooking.  And put on a pot of water to boil for topping off the jars.

Once the greens are…

View original post 111 more words

Blackberry Jalapeno Pepper Jelly

My family loves pepper jelly of any kind. So I’m always looking for varieties to add to our pantry. When a neighbor brought me a ton of peppers, I started searching for a new recipe. My boys fell in love with this one….I witnessed one son add it to a sausage biscuit and another son ate it with peanut butter crackers!!!! This one may be their favorite yet!!

Ingredients:
7- 8 fresh jalapeno peppers
1 – large or two medium size green bell pepper, seeded
2 – cups frozen blackberries, thawed
2 – tablespoons lemon juice
1 – cup apple cider vinegar
3 – cups sugar
4 – 5- half pint canning jars with lids and bands

Directions:

Cut off the stems and remove the seeds from the peppers (I recommend wearing latex gloves while handling hot peppers). If you want a bit of a kick leave in half of the jalapeno pepper seeds.

Puree peppers using a food processor or high speed blender with cider vinegar until smooth.

In a large pot combine pepper puree with sugar.

Add the frozen blackberries to the blender or food processor and blend the blackberries with the lemon juice.

Add the blackberry pulp to the pepper purée and sugar. Bring the mixture to a full boil, reduce heat to a light boil and simmer, stirring frequently.

Remove from heat and skim off any foam (if any). Ladle into hot, sterile jar leaving 1/4 inch head space. Wipe rims with a clean cloth. Apply lids and bands and finger tighten.

Add jars to hot water bath and process in boiling water bath for 10 minutes.

My family loves to serve on crackers with softened cream or goat cheese as a snack or appetizer. And this is so easy to grab and go! When you are going to a family get together grab a jar of pepper jelly, a package of cream cheese and box of crackers and you are ready to go!!!

Cowboy Candy

When the men folk of the family love hot stuff and they love pickles you have to get creative to keep them on their toes…..introducing COWBOY CANDY. 

It is essentially a candied jalapeno  – a little sweet and as spicy as you like. You can use it any way you want – on pizza, on crackers, on sandwiches, let you imagination be the judge.

Yields 3 Pints

img_5287

Ingredients:

  • 3 pounds fresh firm, jalapeno peppers, washed
  • 2 cups apple cider vinegar
  • 6 cups white granulated sugar
  • 1/2 teaspoon turmeric
  • 1/2 teaspoon celery seed
  • 3 teaspoons granulated garlic (optional)
  • 1 teaspoon ground cayenne pepper (optional – for extra HEAT)

img_5289

Process:

  1. Wash the jalapenos, and take out as many seeds as you desire.  The more seeds you leave in, the hotter the Cowboy Candy.
  2. Slice into uniform 1/4″ circle slices.
  3. In a large stainless steel pot, bring apple cider vinegar, granulated sugar, turmeric, celery seed, granulated garlic, and ground cayenne pepper to a boil.
  4. Once boiling, reduce heat and simmer for 5 minutes.
  5. Add sliced jalapeno peppers to simmering mixture.  Simmer for an additional 5 minutes.
  6. Using a slotted spoon, carefully skim out all jalapenos and transfer to empty jars using the funnel ensuring 1/4 in head space.
  7. Once again, turn up the heat on the pot with the remaining syrup and bring to a full boil. Boil hard for 5 minutes.
  8. Using a ladle, pour the boiling syrup over the jalapenos in the jars.
  9. Use debubbler to release any remaining bubbles. Add additional syrup if needed to maintain 1/4″ headspace.
  10. Wipe the rim of each jar with a damp cloth ensuring that the rims are clean.
  11. Place flat lid and screw band on jar and finger tighten.
  12. Place in a waterbath canner and boil for 15 minutes for pints or 10 minutes for half-pints.
  13. Allow 4 weeks before opening.img_1197

Canning Sweet Pickle Relish

Sweet Pickle Relish is a necessity in our kitchen. My family loves it on hotdogs, in potato salad, egg salad, tuna and chicken salad. And some are guilty of even eating it by itself!! It is one of those things that is simply nice to have on hand.

The original recipe that I used said that this would make 7 half pints. I think that all depends on how much you cook your relish down and how much water is in your cucumbers. I got more than double that amount when I made it.

Ingredients:

  • 8 lbs of pickling cucumbers
  • 1/2 cup pickling salt
  • 4 cups of white vinegar
  • 2 cups of sugar
  • 1 tablespoon celery seed 
  • 1 tablespoon mustard seed
  • 2 1/2 cups (2-3 medium) onions finely chopped.
Instructions:
  1. Wash the cucumbers well under cold running water, trim off both ends, but leave the skin on. Chop into chunks, then finely chop in a food processor. Put in a large pot or bowl. Sprinkle with the salt, mix the cucumbers and salt by hand. Top with enough cold water to cover completely. Let stand for 2 hours.
  2. Finely chop the onion and set aside.
  3. Drain the cucumbers, rinse well and drain.
  4. In large stock pot, mix together the vinegar, sugar and spices. Stir in the onions and then the cucumbers.
  5. Bring to a boil, lower to a simmer and simmer for 10 minutes.
  6. Pack hot relish into pint or half pint jars.
  7. Leave 1/2 inch headspace.
  8. Debubble, adjust headspace.
  9. Wipe jar rims.
  10. Put lids on and tighten.
  11. Process in a water bath for 15 minutes.
  12. Let it sit for at least a month before opening.

As always ~ Enjoy and Happy Canning!

“Canned” Pound Cake

It’s the time of year for gift giving – give a gift of Homemade Love…

Preserving the Good Life

Grandma’s have done this for years yet you won’t find this in any canning books.  Based on friends who have done this for years and the canning grannies out there, this can be stored for up to one year. (But let’s be real – how long do you really think these will stick around?)  Besides, they make great gifts!

Preheat the oven on 350°.  Grease 12 wide mouth pint jars (or 6 quarts) and set them aside.  I used Crisco to grease mine and if that’s not handy, you can use Baker’s Joy Spray.

20161120_073818

I whipped up my mother’s “top secret” pound cake recipe and then spooned each jar 1/2 full, be careful not to get any on the edges of the jar.  This takes a little time and a steady hand.

20161120_082002

For a more even bake, put the jars directly on the rack and bake until golden brown, in…

View original post 282 more words

Canning Red Pepper Jelly (No Pectin)

Preserving the Good Life

Sweet, spicy, hot pepper jelly + cream cheese + Ritz crackers = YUM!  This quick and easy, addictive appetizer is ready in minutes!

I had an abundance of peppers on hand so I doubled the following recipe and ended up with 11 jelly jars of jelly.

  • 1 1/2 lb red bell peppers, cut into 1 inch pieces
  • 2 teaspoons dried hot red-pepper flakes
  • 3 cups sugar
  • 1 cup white-wine vinegar
  • 1 tablespoon unsalted butter
  • 3/4 teaspoon salt

Cut peppers into 1 inch pieces.

20160927_200847-1

Add peppers and pepper flakes in a food processor or blender.

20160927_201322-1

Pulse until finely chopped.  Depending on if you prefer a chunky jam or a not so chunky jelly will determine how much you chop your peppers.

20160927_201456

Stir together pepper mixture, sugar, vinegar, butter and salt in a heavy pot.  Bring to a vigorous boil and boil for 20+ minutes, stirring frequently, until it begins to thicken. …

View original post 139 more words